Gluten Free Chocolate and Fudge Muffins

Having made some blueberry muffins, I also made some chocolate and fudge muffins. I have made chocolate muffins before, this time though I used a different recipe.

Gluten Free Chocolate and Fudge Muffins

Heat oven to 200C/180C fan/gas 6 and line a 12-hole muffin tin with paper cases. 

I bought my paper cases from Amazon, though I later found similar ones in Waitrose.

Ingredients

100g unsalted butter softened, plus 1 tbsp, melted, for greasing

140g golden caster sugar

2 large eggs

140g natural yogurt

1 tsp vanilla extract

2 tbsp milk

250g plain gluten free flour

2 tbsp of cocoa

2 tsp baking powder

1 tsp bicarbonate of soda

100g of chocolate chips (dark or milk)

20g of fudge pieces to decorate.

Beat the butter and caster sugar together until pale and fluffy. Then add the eggs and beat in for  about a minute. You then need to mix in the yogurt, vanilla extract and milk. Combine the flour, cocoa, baking powder and bicarbonate of soda in a bowl with ¼ tsp fine salt.

Add this into the wet ingredients and stir in. Finally, fold in the chocolate chips and divide the mixture between the muffin cases.

Add extra chocolate chips and fudge pieces to the top of the muffins.

Bake for 5 mins, then reduce oven to 180C/160C fan/gas 4 and bake for 15-18 mins more until risen and golden, and a metal skewer inserted into the muffin comes out clean.

Cool in the tin for 10 mins, then carefully lift out onto a wire rack to finish cooling. Will keep for 3-4 days in an airtight container.

You can after a day or two, pop them in the microwave for 10-15 secs on high to freshen up.

Gluten Free Blueberry Muffins

Gluten Free Blueberry Muffins

Decided to try and make some gluten free blueberry muffins. The aim was to recreate a traditional muffin experience, but make it gluten free.

Ingredients

100g unsalted butter softened, plus 1 tbsp, melted, for greasing

140g golden caster sugar

2 large eggs

140g natural yogurt

1 tsp vanilla extract

2 tbsp milk

250g plain gluten free flour

2 tsp baking powder

1 tsp bicarbonate of soda

125g pack blueberries (or use frozen)

Heat oven to 200C/180C fan/gas 6 and line a 12-hole muffin tin with paper cases. 

 I bought my paper cases from Amazon, though I later found the kind I like in Waitrose.

Beat the butter and caster sugar together until pale and fluffy. Then add the eggs and beat in for  about a minute. You then need to mix in the yogurt, vanilla extract and milk. Combine the flour, baking powder and bicarbonate of soda in a bowl with ¼ tsp fine salt.

Add this into the wet ingredients and stir in. Finally, fold in the blueberries and divide the mixture between the muffin cases.

Bake for 5 mins, then reduce oven to 180C/160C fan/gas 4 and bake for 15-18 mins more until risen and golden, and a metal skewer inserted into the muffin comes out clean.

Cool in the tin for 10 mins, then carefully lift out onto a wire rack to finish cooling. Will keep for 3-4 days in an airtight container.

You can after a day or two, pop them in the microwave for 10-15 secs on high to freshen up.

Probably the most authentic paella I have cooked

I cook paella quite a bit, though I have been told what I cook usually isn’t paella, but a rice dish!

This time I wasn’t even trying, however the end result was rather good. I admit I cheated slightly and used a Waitrose Paella Paste jar, but I think I got the cooking right as the taste and texture was reminiscent of the excellent paella I had from Riceminster last week.

It was towards the end of the month, so the fridge needed restocking and there wasn’t too much in the cupboards. I had decided to cook some cod croquettes, salmon and serve it with rice. However we didn’t have any plain (well basmati) rice left, but I did have some paella rice. I also had a jar of Waitrose Paella Paste.

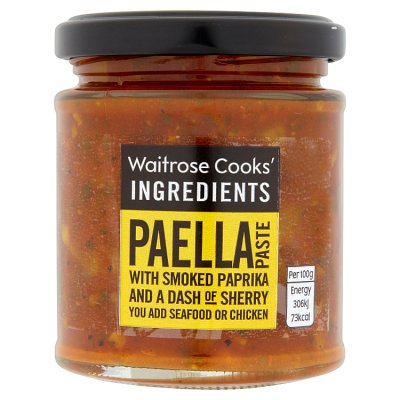
I quite like the jar and when I have used it in the past it has worked well, never quite authentic, but still tasty.

As I said there wasn’t too much in the fridge, so in a large frying pan, I cooked some smoked bacon (pancetta) and a chopped red onion. I would usually use some peppers and mushrooms, but there was none in the fridge. I did check to see if I had a tin of beans I could use, but though I had tinned lentils and kidney beans, there was nothing else.

Once the onions were softened, I added the paella rice and stirred the rice around until mixed in with the onions and bacon. I then added the Waitrose Paella Paste and stirred that in.

I then added chicken stock, made using a Knorr Chicken Stock Pot, covering all the rice. I then stirred and then left alone. Well not quite, as I added some frozen peas about 10 minutes later.

I once got “told off” for stirring my paella, so now I just as advised leave it to cook.

I think what I did this time however, was not to add further stock and just let the paella cook turning down the heat slightly as the stock reduced. I did think I should add more stock, but left it alone.

I served it up and I did like how it came out. I had mine with cod croquettes and salad.

paella

As for the taste and texture it was very similar to the paella I had from the Temple Quay market from Riceminster and those I have had in Spain. I think this was one of the best paella dishes I have cooked, certainly one of the most authentic tasting.

Gluten Free Red Onion Rings

Gluten Free Red Onion Rings

Having made some crunchy breaded chicken wings I had some of the seasoned flour and egg left. Not wanting to waste it and having enjoyed the onion rings I had cooked before, decided to mix it together with some milk and coat some onion rings and fry them.

As this was using leftovers, I didn’t measure anything out and so after mixing the egg and flour together I added some milk until the batter coated the back of the spoon.

I took a red onion and sliced it thickly across and then separated out the individual rings of onion. I kept the rest of the onion, diced for another dish. 

I used a smaller frying pan and shallow fried the onion rings in hot oil a minute or so on each side until the batter was cooked and a golden brown.

The end result was beautifully crisp onion rings, the batter had an excellent crunch, they had a succulent taste of onion on the inside. Unlike some I have had these weren’t greasy either, which I often think is a result of cooking rings twice.

These were delicious, the red onion providing a different flavour to the brown onion I used last time and a lovely light crisp batter.

As I had a little bit of batter left I did some green pepper strips as well.

Gluten Free Crunchy Breaded Chicken Wings

Gluten Free Crunchy Breaded Chicken Wings

It was time to prepare dinner and I was thinking about what to cook and how to cook it. I had decided to cook some chicken wings, and my usual recipe is to either make a sauce or use a ready made cooking sauce and bake them in the oven. I decided I would do the chicken wings two ways. One would be coated in miso sauce and for the others I would do as crunchy wings.

I usually cut off the nib of the wing and then cut them into two pieces, to make them easier to eat.

The wings were then coated in seasoned flour. I used gluten free self-raising flour (as we were short on plain four), some chicken seasoning, paprika and chilli.

I then set up a bowl of beaten egg and one of gluten free seasoned breadcrumbs.

Keeping one had wet and the other dry, the floured chicken is coated in the egg and then coated in the breadcrumbs.

These are placed on a lined baking tray (I use baking parchment for these). The chicken wings are done one by one and are then baked in the oven for 20-30 minutes until the coating is browned and the chicken is cooked. Mine took a little longer than planned as I had more in the oven.

They were lovely and crunchy on the outside and the chicken was moist and tender on the inside. Lots of flavour in the coating as well.

Gluten Free White Chocolate Chip Cookies

Gluten Free White Chocolate Chip Cookies

The process I used is pretty much the same as the process I have used on other cookies I have made.

Ingredients

225g of unsalted butter
125g gluten free bread flour
125g gluten free plain flour
1 egg
1 egg yolk
100g caster sugar
120g light brown sugar
1 pack white chocolate chips
One teaspoon salt
One teaspoon bicarbonate of soda
Two teaspoons of vanilla essence

Melt the butter in a pan and bring to the boil, stirring frequently. The aim is to boil off some of the water off the butter. Once the butter melted and had turned slightly brown this was removed from the heat and cooled to room temperature. I find it is better if it is room temperature, too warm and the cookies are not as good.

Cream the liquid butter with the sugar, vanilla essence. The idea is to mix it until it is light and fluffy. Use an electric mixer if you have one, ours was broken, so I did it by hand, which was hard work. Beat in the eggs until they are incorporated into the mixture.

Combine the flours, salt and bicarbonate of soda.

Stir in the dry ingredients a third of it at a time until it is incorporated.

Using a wooden spoon fold in the raspberry and white chocolate.

Chill.

Place six small balls, about 2-3cm across, of dough on a baking tray and bake for 6-9 minutes.

This quantity of ingredients will make about eighteen cookies.

After cooking leave on the tray and then after three minutes move to a rack to cool further.

Eat!

Gluten Free Onion Rings

Gluten Free Onion Rings

I wasn’t expecting these to be as good as they were, but I was well pleased with how these turned out in the end.

I quite like onion rings and if I am out and about eating out (well when I could) I would often add some onion rings to my meal. Though I have tried various shop frozen onion rings, I haven’t found any that I would say are fantastic. Also not seen any gluten free ones either.

This is a relatively simply recipe for making gluten free onion rings.

I took a large brown onion and sliced it thickly across and then separated out the individual rings of onion.

I kept the rest of the onion, diced for another dish.

In a mixing bowl, I whisked up half a cup of gluten free self raising flour with an egg and some milk. Adding more milk until you have a batter which will coat and stick to the onion. 

Now if you have a deep fat fryer you could use that, I don’t have one so I didn’t.

I took my large frying pan and shallow fried the onion rings in hot oil a minute or so on each side until the batter was cooked and a golden brown.

Gluten Free Onion Rings

The end result was beautifully crisp onion rings, the batter had an excellent crunch, they had a succulent taste of onion on the inside. Unlike some I have had these weren’t greasy either, which I often think is a result of cooking rings twice.

We will certainly make these again, as they were probably the best onion rings I have ever cooked and to be honest the best I have ever tasted.

Gluten Free Mini Chocolate Loaf Cakes

Gluten Free Mini Chocolate Loaf Cakes

These are tasty tiny loaf cakes.

I had seen these mini loaf cake cases in Sainsburys a few times, but I bought a pack to try them out.

cake cases

The recipe is based on the weight of two eggs

Ingredients

      • 3 standard eggs
      • Take the same weight of two of the eggs of soft butter
      • Take the same weight of two of the eggs in caster sugar
      • Take the same weight of two of the eggs in self-raising gluten-free flour
      • Vanilla essence
      • Two tablespoons of cocoa powder
      • Half a pack of chocolate chunks.

Cream the sugar and butter until you have a smooth consistency.

Beat the eggs, add some vanilla essence.

Stir the eggs into the creamed butter and sugar with some of 

the flour, until the mixture is smooth and consistent.

Then fold in the remaining flour and the cocoa until it is combined with the rest of the mixture.

Then stir in the chocolate chunks, leaving some to add to the top of each mini loaf.

Spoon into a the mini loaf cake cases. The mixture should be enough for five or six cases. 

Bake in a 180º normal oven or 160º fan oven for 25 minutes or until a metal skewer inserted into the cake comes out clean.

You can add fudge icing for extra decadence if you wanted to.

Time for some paella

I do like a good paella, though I have been told a fair few times that what I cook and call paella, isn’t paella.

That I get, I am not trying to cook an authentic Spanish version of paella, but one that we like and find tasty. I have been cooking this dish for a fair few years, but got told once by a Spanish person that what I was cooking wasn’t authentic paella, which is correct, so I normally describe this as a Spanish inspired rice dish.

To make this paella I took my large paella pan added a splash of olive oil.  I then  added some pancetta, diced onion and sliced red pepper. This is then cooked off slightly before I added some mushrooms. Once the onions are softened I add the paella rice and stir it into the onions and peppers. I added a paella mix from Waitrose, but you could, of course, use your own spices, herbs and saffron. I then added some stock.

This is then left to cook, without stirring, definitely without stirring.

In a separate pan I cook the sliced cooking chorizo and add this to the paella when it is nearly cooked. I do a similar thing with the butterflied prawns.

I then finish off with finely chopped parsley and some lemon.

Delicious.

Time for some more Butternut Squash and Mushroom Risotto

Having enjoyed the butternut risotto the last time we had it, I made it again.

Butternut Squash and Mushroom Risotto

Having thought for many years that risotto was a complex dish to cook I now find it one of my go to recipes when we want something tastier than plain rice to go with a meal. Sometimes we just have the risotto.

One of the key ingredients for this is the rice, always use a proper risotto rice, it won’t work with other kinds of rice.

For this recipe I used:

      • 250g of Gallo Traditional Risotto Rice
      • 1 clove of garlic
      • 1 onion
      • 1/2 red pepper
      • 1/2 yellow pepper
      • 1/4 of a butternut squash
      • 4 chestnut mushrooms
      • 20g of butter
      • Dried Italian herbs
      • Splash of olive oil
      • 1 Knorr Chicken Stock Pot
      • 50g parmesan cheese
      • Water

Dice the onion, pepper and butternut squash.

Cut the chestnut mushrooms into chunks.

In a large hot frying pan add the olive oil and the butter. When the butter has melted and is sizzling, add the garlic, diced onion, pepper and butternut squash.

When these are softened add the chestnut mushrooms.

The add the Gallo Traditional Risotto Rice and stir into the mushroom, onion and pepper mixture, until the rice is coated and well stirred in the pan.

Butternut Squash and Mushroom Risotto

Add the Knorr Chicken Stock Pot and water to cover the rice. Stir well.

As the water and stock is absorbed, add more water and continue to stir.

Cook the rice for 16-18 minutes until the rice is soft tender and creamy, but the grains are still firm.

Stir in the  parmesan cheese.

Season if required.

Serve.